Entity Framework & Windows Phone: Part 2
July 31, 2012Entity Framework & Windows Phone: Part 1 | Part 2 | Part 3
This is a continuation of my last post Entity Framework & Windows Phone: Part 1 where we walked through the steps to create a simple data model using Entity Framework. If you are unfamiliar with how to do this or to simply catch up, I suggest you take a look.
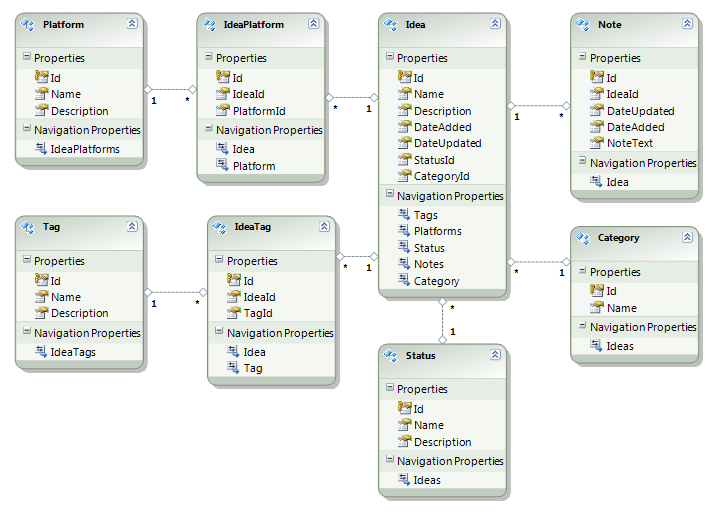
When we left off, we had created a simple data model that has three entities. We are going to jump ahead and use a more extensive data model that looks like this:
Significantly different than where we left off but this is about all the info we will need to create a complete Windows Phone app. This took an hour or so to put together.
I will briefly explain what was added. We want each Idea to have multiple Tags but want to share the Tags with other Ideas. To make this happen I created the entity IdeaPlatform with two One-to-Many relationships with the many ends on the IdeaPlatform entity. The Platform is the same setup. On the Idea entity, the names Navigation Properties have been shortened to match the name of their respective entities. The Status entity is the same as Category entity described in Part 1.
Code for this part can be found here.
Part 2: Generating database and data class files
With a complete data model, we can generate the database file. I use Entity Designer Database Generation Power Pack as it helps when you update the entity model and then have to regenerate the database file and data classes.
- First step is to right click on the workspace and select Generate Database from Model… As we are doing this for the first time we will leave TablePerTypeStrategy selected. Click next.

- Once the Database Wizard opens, click the Connection… button. In the Connection Properties make sure the Data Source is set to Compact 3.5. If it set to something else, click the Change… button and select it.

- On the Connection Properties dialog, click on the Create… button. Set the path and file name for the db file and click OK. No password is needed so answer yes to the warning.

- Now we are back on the Connection Properties dialog, I usually click the Test Connection button, just to be sure. Now we can click OK.

- Back on the wizard, all we need to do is click Next.

- After a few seconds, the SQL script will have finished generating. This script will create the tables and the relationships between them. All there is to do here is click Finish.

- Next step is to execute the SQL script from the last step. Right-click on the script text and choose Execute SQL.

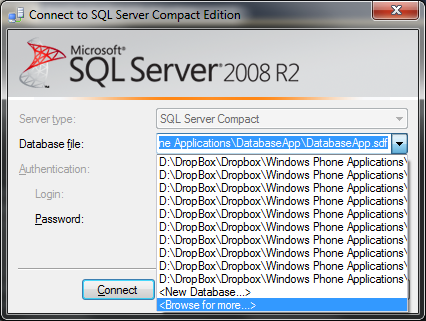
- When the Connection dialog opens, choose the correct .sdf file we created in steps 2 to 4. I put mine in the solution folder with the .sln file. Once you select the correct file, click Connect.
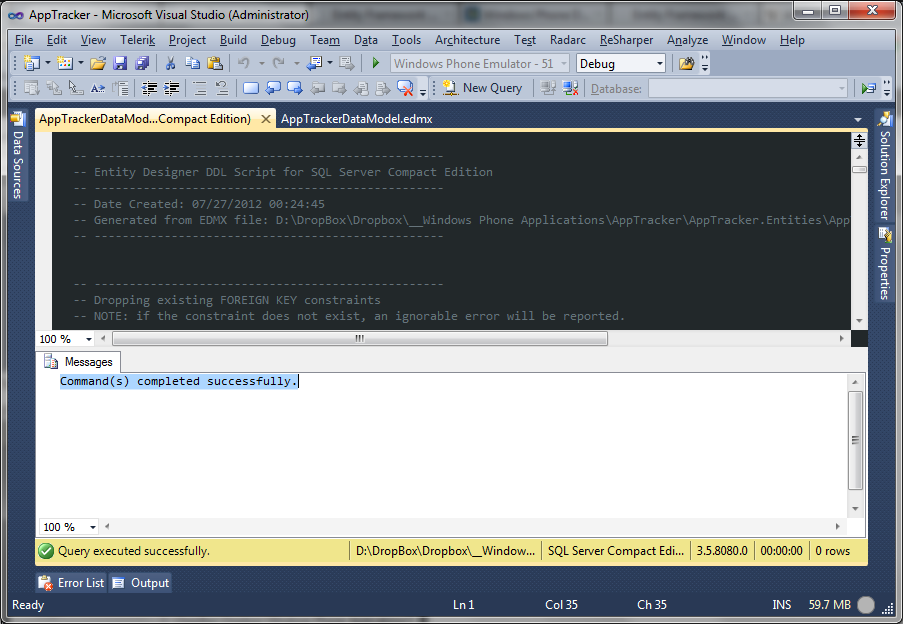
- After another few seconds, the script should return Command(s) completed successfully. This completes the database creation steps.
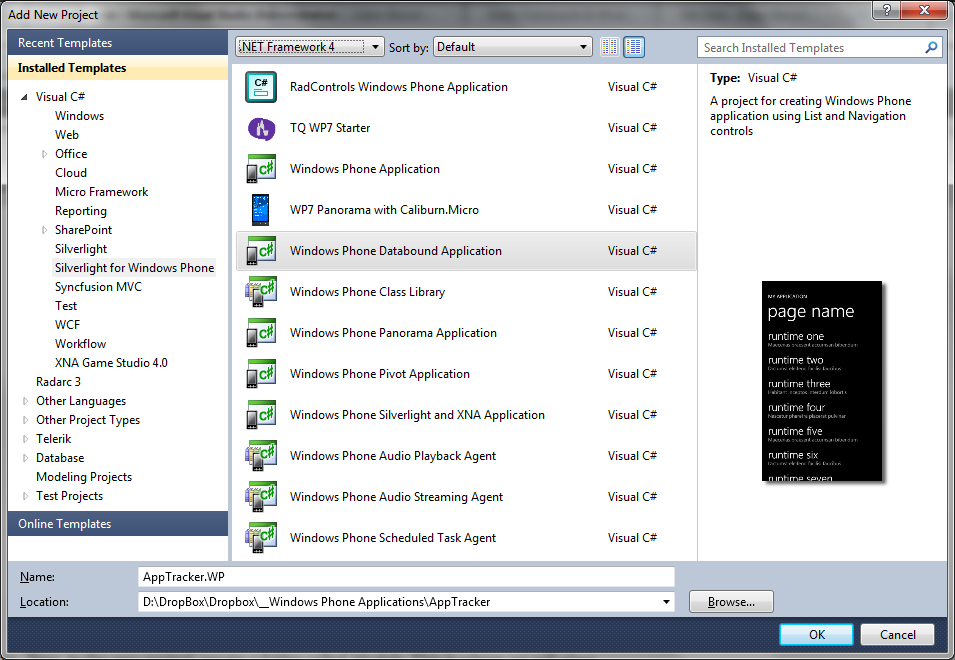
- This next step is going to seem out of order but we need some info from this step for a later step. In the Solution Explorer, Right-click the solution (the root node of the tree) and click Add then New Project. We are going to add a new Windows Phone Databound Application called AppTracker.WP. When prompted, Set the OS target to Windows Phone OS 7.1
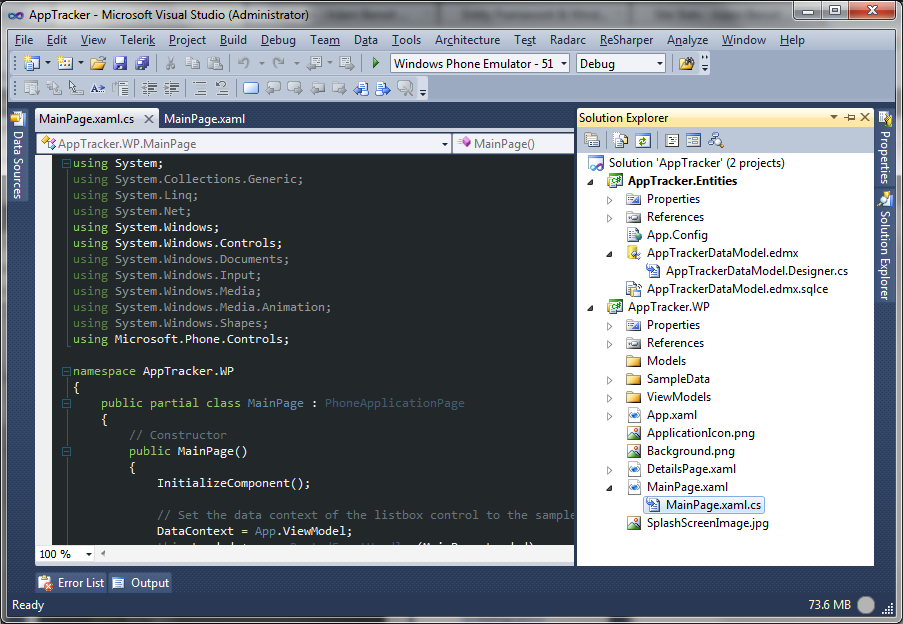
- Now, in the new project, create a folder called Models. This is where we will place our generated data classes. Then open the MainPage.xaml.cs file so we can copy the namespace in a few minuets.
- Open your text editor and paste the following command line into it:
sqlmetal "--PATH AND SDF FILE--" /code:"--PATH AND CS OUTPUT FILE--" /language:csharp /namespace:--NAMESPACE-- /context:--CONTEXT NAME-- /pluralize
- Now we can start replacing the placeholders with the correct values:
- –PATH AND SDF FILE–
- Replace with the file name and full path the database file.
- Example: D:\DropBox\Dropbox\__Windows Phone Applications\AppTracker\AppTracker.sdf
- –PATH AND CS OUTPUT FILE–
- Replace with the path to the Models folder we created. Then add the name of the file to be created.
- Example: D:\DropBox\Dropbox\__Windows Phone Applications\AppTracker\AppTracker.WP\Models\DataClasses.cs
- –NAMESPACE–
- Replace with the namespace copied from the MainPage.xaml.cs file. Then add .Models to the end of it. Giving it a namespace like this helps keep things separate in a MVVM structure.
- Example: AppTracker.WP.Models
- –CONTEXT NAME–
- Replace with the name of the data Context. I usually use the <AppName>DataContext format.
- Example: AppTrackerDataContext
- –PATH AND SDF FILE–
- Once those replacements have been made, the command line we created should look like this:
sqlmetal "D:\DropBox\Dropbox\__Windows Phone Applications\AppTracker\AppTracker.sdf" /code:"D:\DropBox\Dropbox\__Windows Phone Applications\AppTracker\AppTracker.WP\Models" /language:csharp /namespace:AppTracker.WP.Models /context:AppTrackerDataContext /pluralize
- With a completed command line, we can open the Visual Studio Command Prompt. Click the Windows Start button or press the Windows key and type the word command. You should see a few options but the ones we are looking for are the Visual Studio Command Prompt items in the Programs section. If you see and reference to 64 bit then you should choose that option, otherwise select Visual Studio Command Prompt.
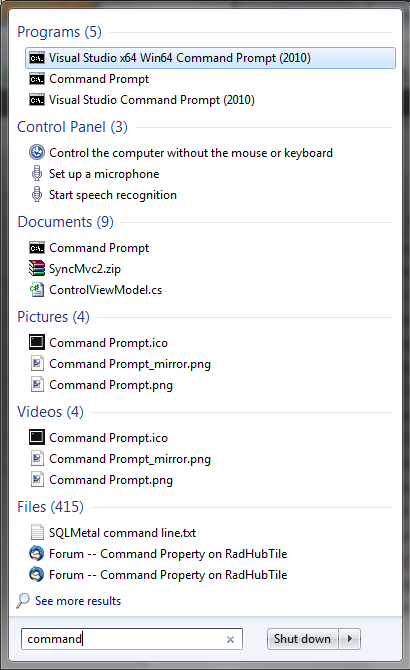
- The command prompt will open. Now we go back to our text editor and copy the command line we created.
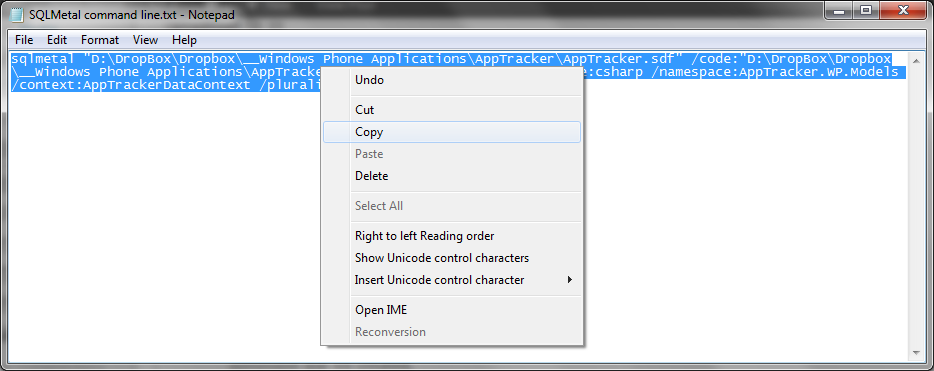
- And Paste it into the command prompt window and press enter.
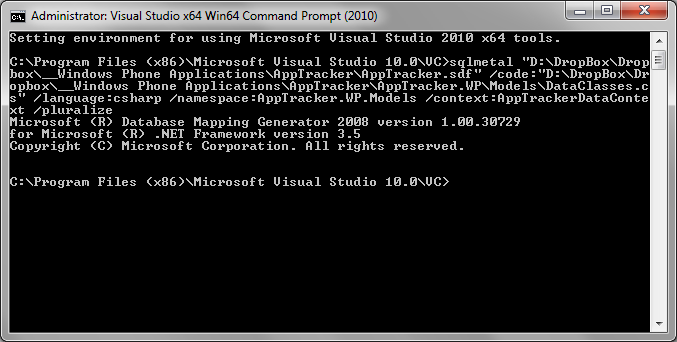
- Which will then create a new .cs file in the specified folder.

- Now we go back to visual studio and add this file to the Models folder we created. Right-click the Models folder and select Add then Existing Item.
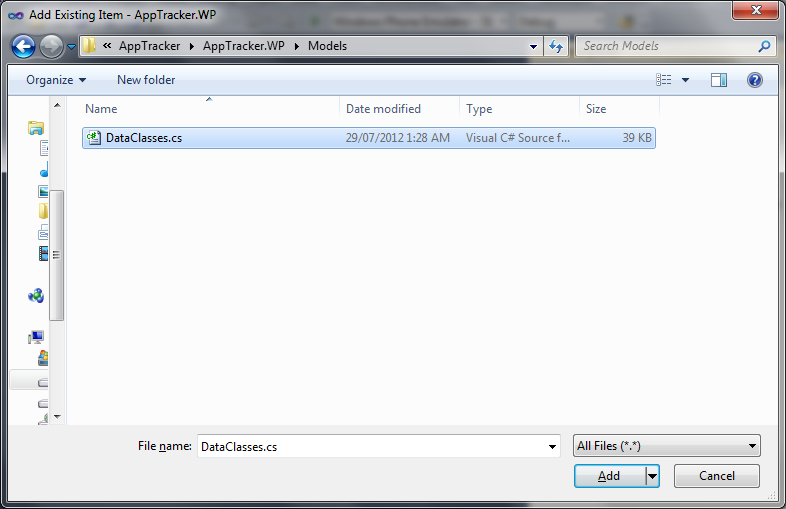
- Once we add this file, there are going to be hundreds of errors. Don’t worry 2 simple steps will fix all of them. The first thing to do as it will correct almost everyone is to add a reference to System.Data.Linq to the AppTracker.WP project. In the following images you will see the red errors down the right side of the text. In the second image, after adding the reference, almost all red is gone. This is an add-on called ReSharper showing me this info, you won’t see this.
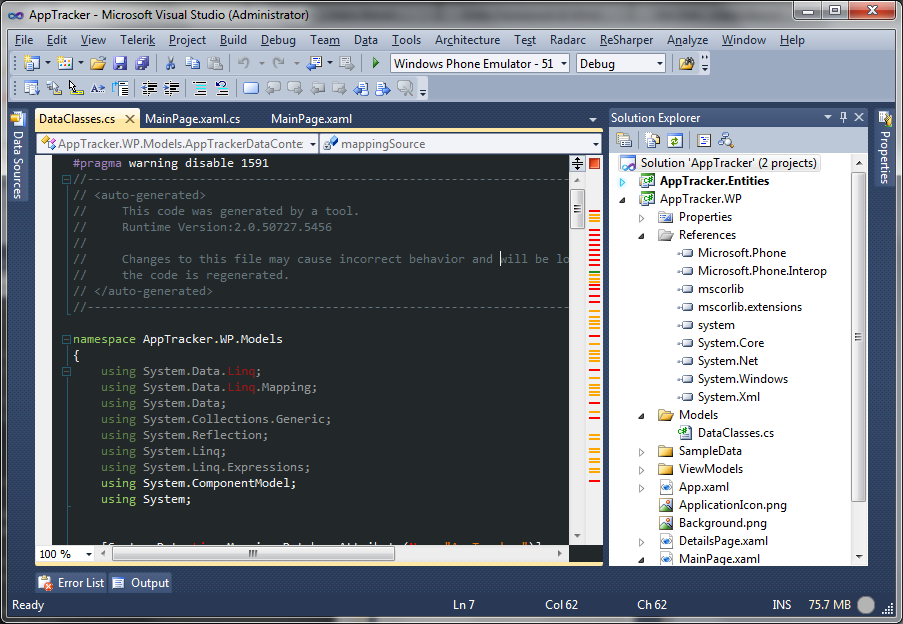
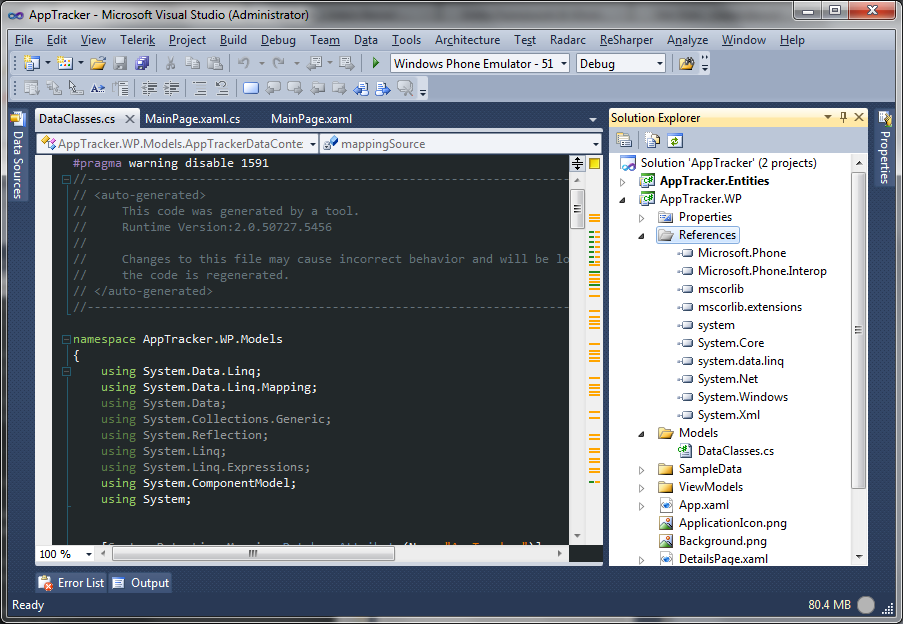
- Only one last step to make this file compatible with Windows Phone. That is to remove any DataContext constructors that mention IDbConnection. There should be two of them.
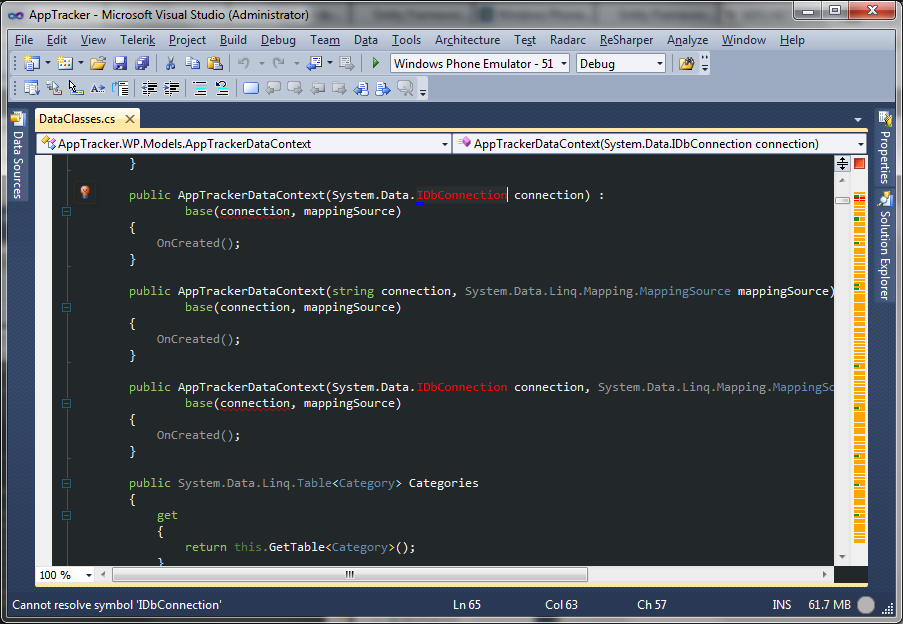
- Now, if we hit F6 to build the solution, it should build successfully with no errors.
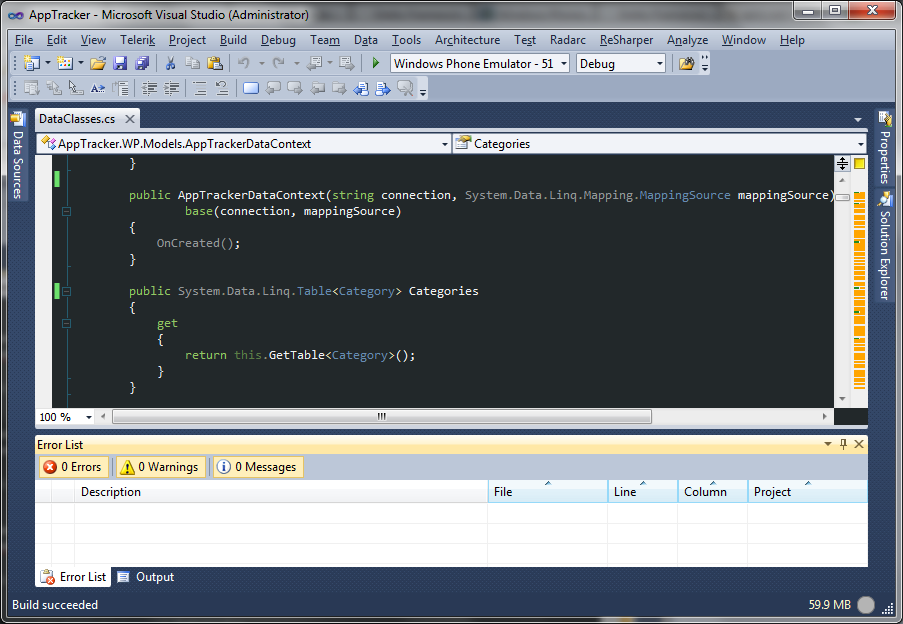
And that covers part two. In this part we took the data model created using Entity Framework in the first part and generated a .sdf database file. We then took that file and used SQLMetal to generate data classes for us. Then we added that to our Windows Phone project and fixed all the errors to make it compatible.
Next part will cover using these generated classes to create a database in Isolated Storage on the handset and populate it with default data.




7 Responses to Entity Framework & Windows Phone: Part 2
Pingback: Entity Framework & Windows Phone: Part 2 | azkafaiz.com
Pingback: Entity Framework & Windows Phone: Part 2
Pingback: Entity Framework & Windows Phone: Part 3 | Adam Benoit
Pingback: Entity Framework & Windows Phone: Part 1 | Adam Benoit
I recommend use SQL Server Compact Toolbox to gerate SDF. sqlcetoolbox.codeplex.com
sorry… gerate class db context. =)
Thanks for the suggestion.
I have yet to try Server Compact Toolbox out but will be soon.
I do like Entity Framework for other project types so it was simple to apply something I already know. Honesty, it takes me no time at all creating the data model in EF, under 30 min for projects like the one described here. I don’t know if Server Compact Toolbox would make it faster, I’ll know when I try.
Cheers,
Adam